
> Charging > Charging This Unit
Charging This Unit
When charging starts, the remaining battery power will be displayed on the LCD display.
Charging will stop automatically when the remaining battery power reaches 100 %.
If the internal temperature is high or low, the protection circuit may activate and stop the charging.
In such a case, leave it in an environment within the charging temperature range (0 °C to 40 °C (32 °F to 104 °F)) before attempting to re-charge.
The internal temperature will rise after power is supplied to the device and it may not be possible to charge the battery immediately.
To turn on/off the LCD display, press the [DISPLAY] button.
If the approved charging cables are not removed after the battery power reaches 100 %, charging will automatically resume after battery power drops below 95 %. The remaining battery power will gradually decrease, even if no output is connected.
The battery is not charged at the time of purchase. Make sure to charge the battery before using.
Automatic Power Supply Switching
This unit is equipped with an “automatic power supply switching” function that prioritizes supplying of power when the input (charging) power is greater than the output (supplying power) power, and allows charging concurrently using the surplus power.
Connect the AC charging cable plug to the [AC INPUT].
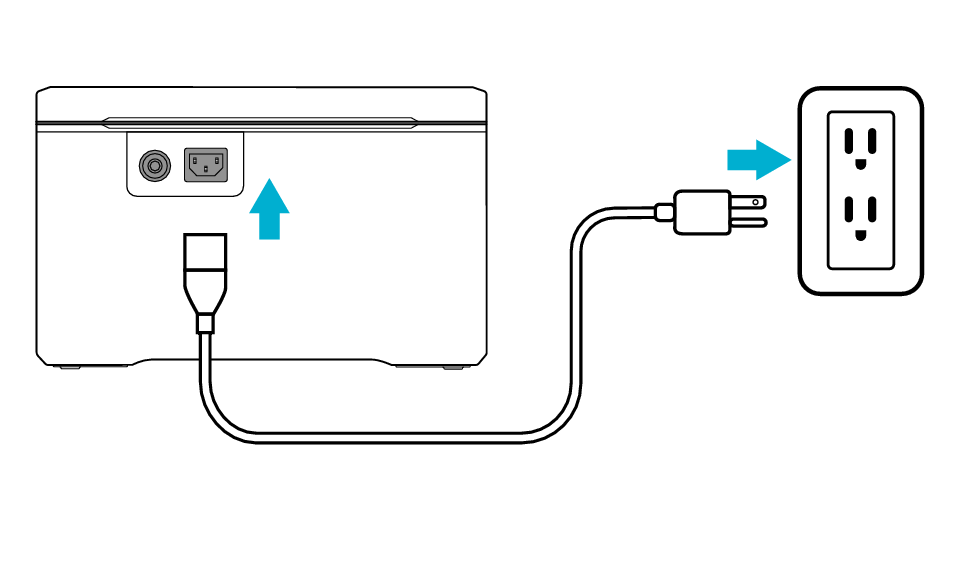
Rear of Unit
AC 120 V
* Use an outlet that can supply power of 500 W or more.
Grounding Instructions
This product must be grounded. If it should malfunction or breakdown, grounding provides a path of least resistance for electric current to reduce the risk of electric shock. This product is equipped with a cord having an equipment grounding conductor and three prong grounding plug. The plug must be plugged into an outlet that is properly installed and grounded in accordance with all local codes and ordinances.
Improper connection of the equipment grounding conductor could result in a risk of electric shock. Check with a licensed electrician, if you are in doubt as to whether the product is properly grounded. Do not modify the plug provided with the product. If it will not fit the outlet, have a proper outlet installed by a licensed electrician.
This unit is compatible with 12V/24V negative ground vehicles.
Connect the 12V adapter to your car’s 12V accessory socket and connect the plug end of the charging cable to the [DC INPUT].
The maximum input current when using a car charging cable to charge is 8 A.
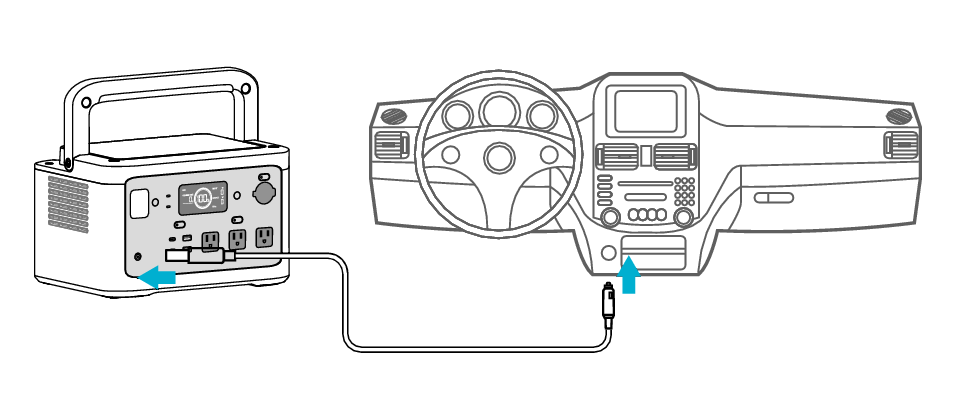
DC 12/24 V
To prevent depletion of your car’s battery, be sure to charge the power supply with the engine running outdoors, and in a well-ventilated area.
Connect the cable of the solar panel to the [DC INPUT].
Please also refer to the instruction manual for the solar panel.
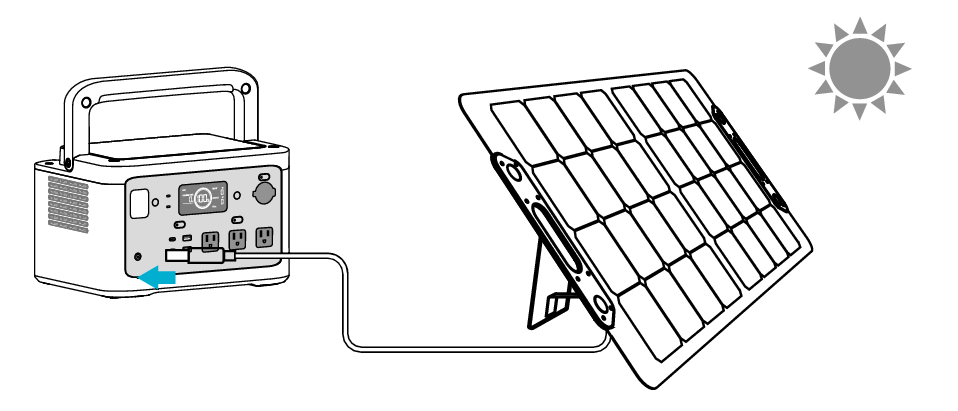
The amount of power generated by solar panel varies greatly depending on the environment such as actual solar radiation, installation location, and temperature.
We have not confirmed the operation of solar panels other than those manufactured by KENWOOD.