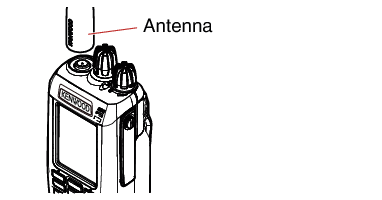
Screw the antenna into the connector on the top of the transceiver by holding the antenna at its base and turning it clockwise until secure.
PREPARATION
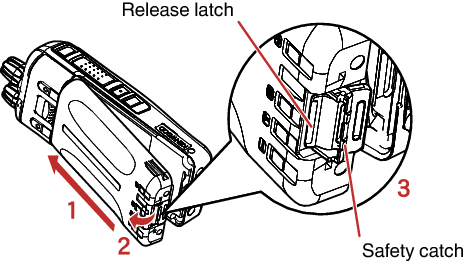
TOPINSTALLING/ REMOVING THE (OPTIONAL) BATTERY PACK
Match the guides of the battery pack with the grooves on the upper rear of the transceiver, then firmly press the battery pack in place.
Lock the safety catch to prevent accidentally releasing the battery pack.
To remove the battery pack, lift the safety catch, press the release latch, then pull the battery pack away from the transceiver.
Note
For battery pack charging procedures and usage, refer to the battery charger Instruction Manual.
The battery pack is not charged at the factory; charge it before use.
Before charging a battery pack that is attached to the transceiver, ensure that the safety catch is firmly closed.
Install the battery pack after cleaning the battery pack contacts and the transceiver terminals.
INSTALLING THE (OPTIONAL) ANTENNA
Note
Determine your positioning at a wide open location. When there is bad reception from the GPS satellite, pinpointing may take a while and location errors may occur.
INSTALLING THE BELT CLIP
Using the 2 screws (M3 x 6 mm), affix the supplied belt clip (KBH-10) in place.
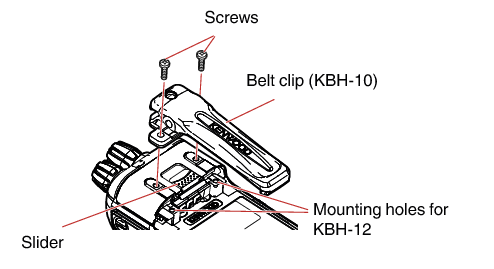
When attaching the optional KBH-12 belt clip, use the mounting holes on the chassis for the KBH-12. (To attach the KBH-12, move the Slider forward.)
Note
If the belt clip is not installed, its mounting location may get hot during continuous transmission or when left sitting in a hot environment.
CAUTION
Do not use glue which is designed to prevent screw loosening when installing the belt clip, as it may cause damage to the transceiver. Acrylic ester, which is contained in these glues, may crack the transceiver’s back panel.
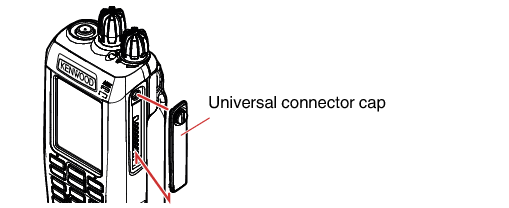
INSTALLING THE CAP OVER THE UNIVERSAL CONNECTOR
Insert the cap into place over the universal connector and secure it in place using the attached screw.
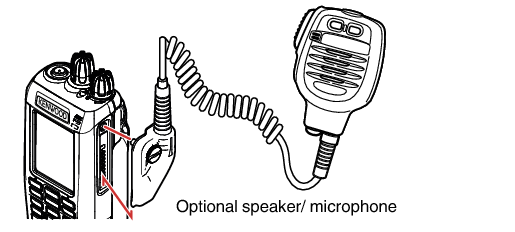
INSTALLING THE (OPTIONAL) SPEAKER/ MICROPHONE OR HEADSET
Insert the guide of the speaker/ microphone or headset connector into place over the universal connector.
Secure the connector in place using the attached screw.
Note
When not using an optional speaker/ microphone or headset, install the cap over the universal connector.